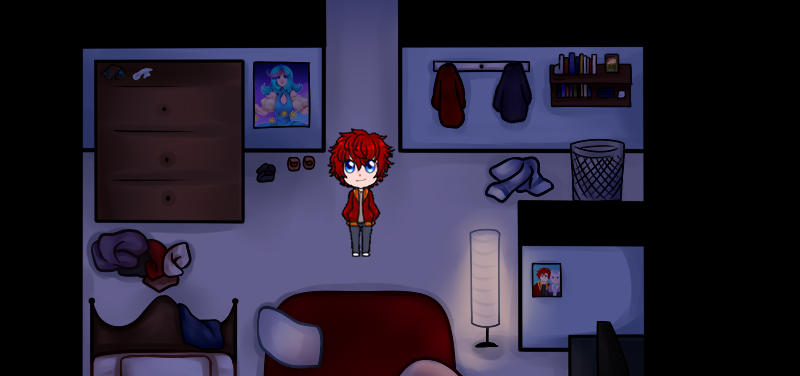
This week I thought I’d try something different and document the process each map goes through, from sketch to ingame. So, I’ll be showing off Kotachi’s room’s map process!
1. Initial Sketch
The layers are hidden in this PNG but I start my sketch off with 4 initial layers- my grid map overlay that shows me where the tiles are for when I code it, a previous map to give me an idea on sizing, and a walking sprite to further help me with sizing furniture and items. I sketch things out somewhat roughly (those walls are definitely not straight) in order to get a feel for the room and get ideas on what details to add.
2. Adding Details
Here I added details to the sketch to add a bit more life to the room. You can also see my grid overlay here to give an idea of how it’ll look in the game.
3. Lineart
At this stage I refine the lineart by drawing over it on a new layer to make the lineart, which will be the basis for how I color the map.
4. Flat Colors
This step is pretty self-explanatory- now that I have the lineart done I just filled it in with colors. I try to keep everything separated so as to make moving and changing things easier, as you’ll see later I had to edit some parts and changed the colors of others.
5. Shading
And here’s where it’s all coming together! I shade each of the parts and do a bit more tweaking, such as changing some colors and adding the pictures.
6. Programming
Finally we reach the last stage- putting it in Ren’Py! Putting the map itself into Ren’Py with wall collisions isn’t actually too hard with my current setup, so now Kotachi is able to walk freely around his room. …Just don’t ask him to interact with anything yet.
And there you have it! That’s my process for making maps in Asterism. You can read how Aries’ map process was done here.


